


I realized yesterday that I've been just a little bit hung up on the idea of "Sunday Dinner" types of meals recently and I suppose that could be because the typical late Fall weather here in the Northeast has been insanely cold, rainy/snowy and just plain old... yuck. The weather in November is always a bit touch and go around here and there are always a few days at the beginning of the month that tend to hint at snow, as a way for mother nature to remind us that her daughter Winter is on her way to this part of the world. To be honest, up here in my neck of the woods, it isn't too far-fetched to expect a November blizzard (and this year we've already come close) and by mid-December, it's definitely beginning to feel a lot like Christmas. But... I digress.
At any rate, this recent food obsession has led to some very hearty and pretty tasty weekend meals and what (in my opinion at least), is a fair amount of seasonal (and yummy) content for me to share here on the blog!
I'll be posting the recipes for the sides that we had with this roast, not long (hopefully) after this goes live and as usual, I'll add the links to them at the bottom of this post, once they're up.
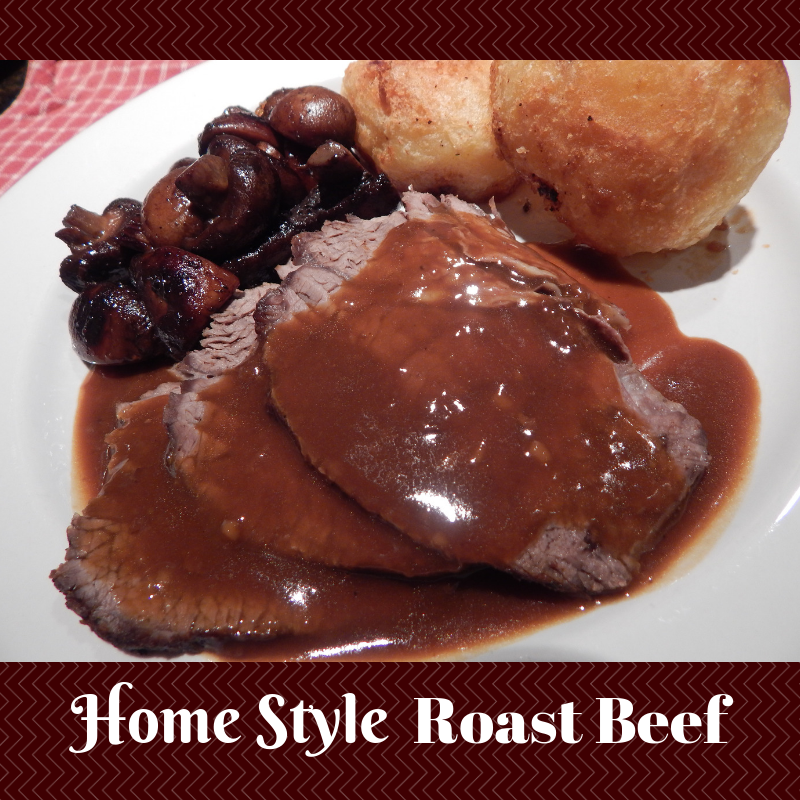
Home Style Roast Beef
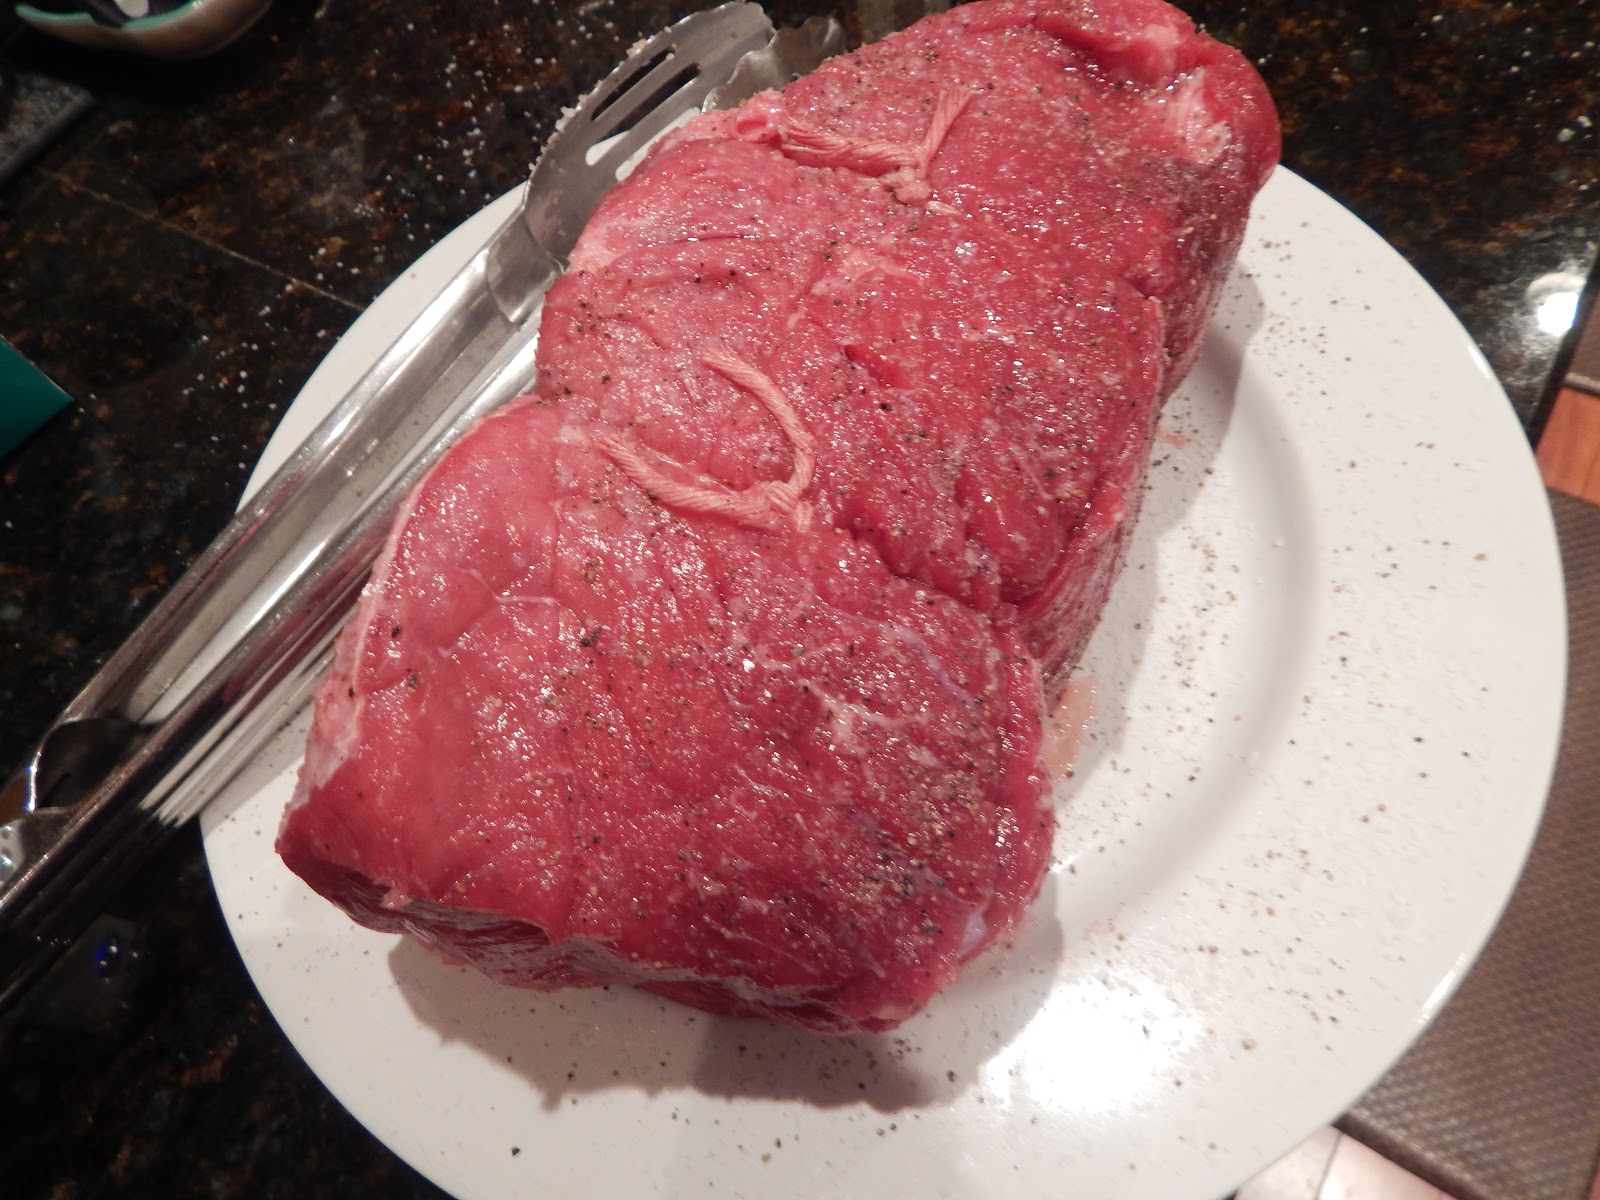
- 5 to 6 Lb Top Sirloin Roast, tied
- 3-4 Lg Carrots and/or Parsnips, washed and cut into halves/thirds
- 2 Med Yellow Onions, peeled and quartered
- Kosher Salt
- Freshly Ground Black Pepper
You'll Need:
Large Roasting Pan
Roasting Rack (optional)
The gravy ingredients and instructions will follow the roasting directions.

1. Season the roast with salt and pepper on all sides. You can lightly dust it with a bit of flour if you like, but it isn't necessary if you don't want to take the time.

2. Preheat your oven to 350°F and place the roasting pan on the stovetop (spanning one or two burners) over medium-high heat. Place the roast in the pan and brown it well on all sides, turning it often to prevent burning. You can also use a large frying pan for this step, but I see no reason to dirty extra dishes.

3. Once the roast is well-browned, remove it from the pan and place the roasting rack (if using one) in the pan. If you don't have a rack, you can add your aromatics (the cut-up onions, carrots, parsnips, etc.) directly to the pan and they'll act as it's "natural" counterpart. If we'd had both carrots and parsnips, I would have used them both. Love me some roasted root veggies!!!

4. Place the roast on the rack and add all of the aromatics around the perimeter of the roast. (Obviously, if you're using your vegetables as your rack, you'll place the browned roast directly on top of your veggies)
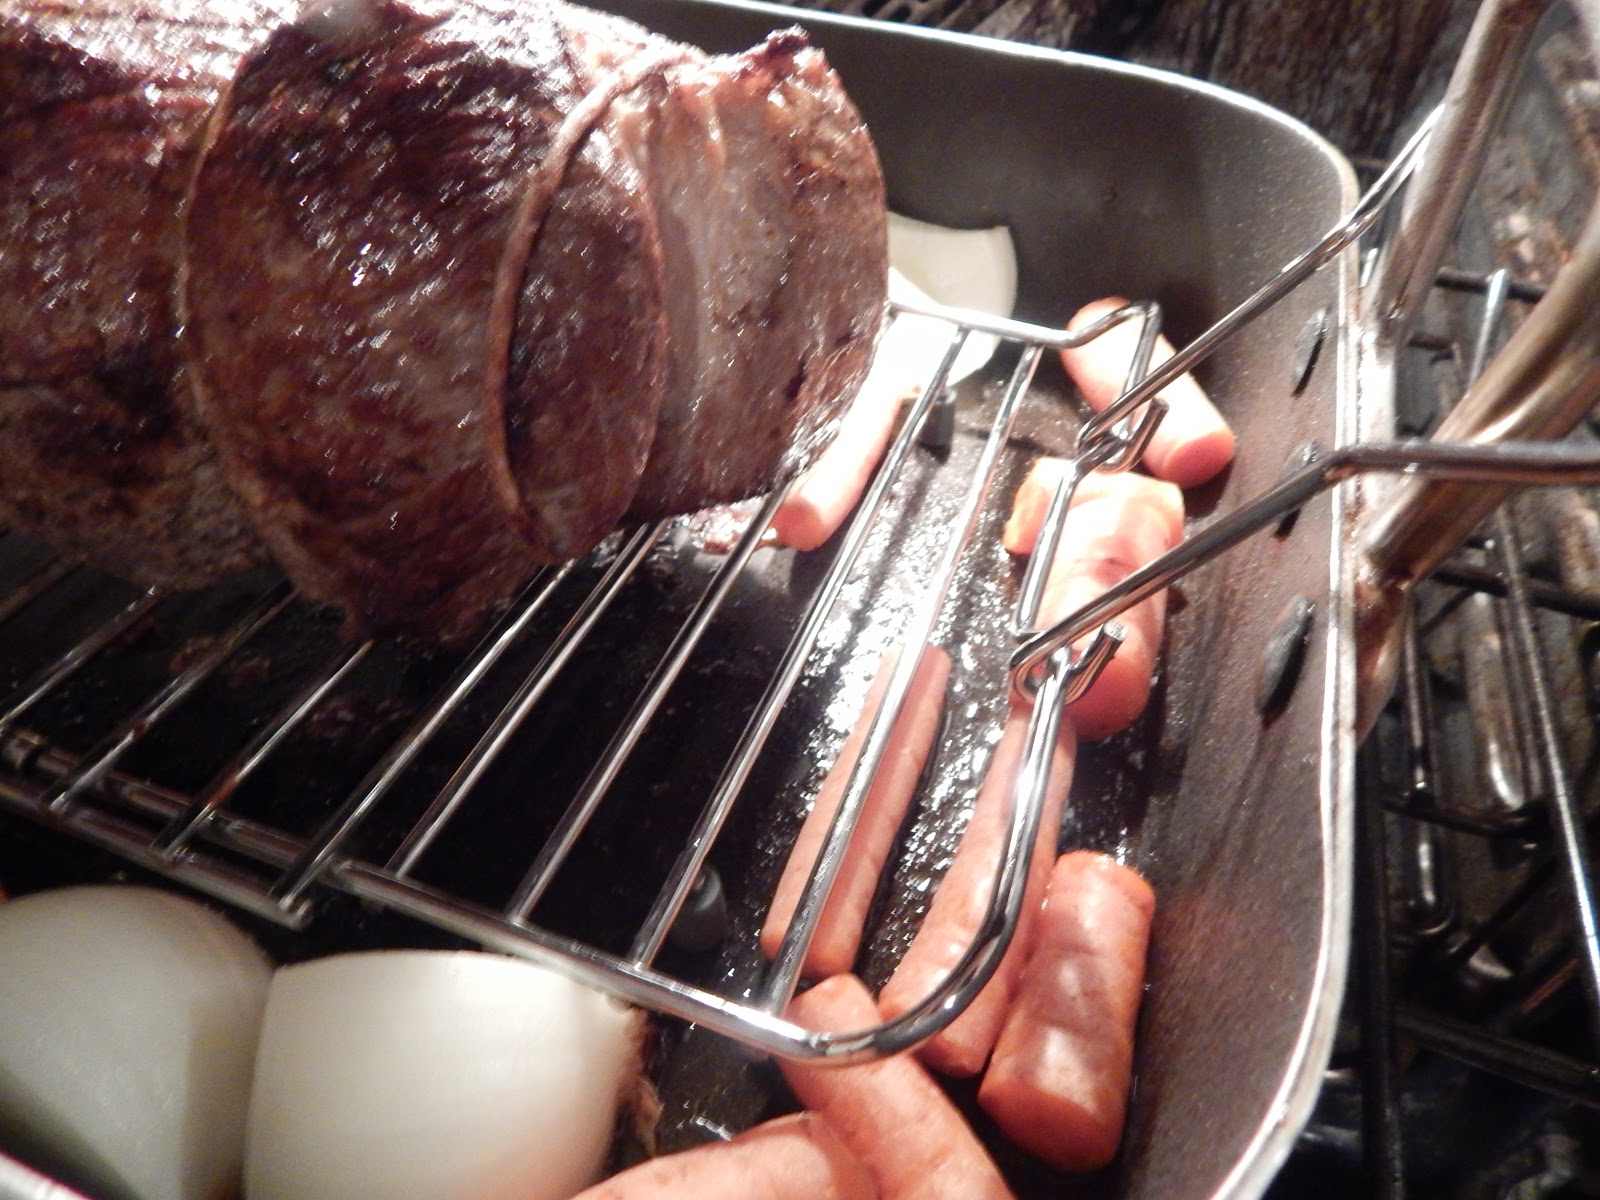

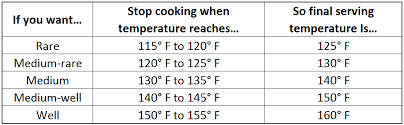
5. Place the pan in your preheated 350°F oven and roast it until the center reaches your desired temperature of doneness. (see chart below for temperatures)
DON'T FORGET ABOUT CARRY-OVER COOKING!! (see last chart below)
 |
| [Illustration by Elizabeth Kurtzman] |
 |
| Graphics Sources: Google Images |
The Gravy
- Beef Drippings, drained of any excess fat
- 2 to 3 Tbls *AP Flour (heaping)
- Water, roughly 1 Cup (for the **slurry)
- 3 to 4 Cups Beef Stock (or Broth)
- 1/2 Cup Red Wine, to deglaze the pan (Dry Vermouth will work fine too)
- 2-4 Tbls Butter
- Kosher Salt
- Freshly Ground Black Pepper
* All-Purpose
** Click HERE if you are not familiar with making a slurry)
What would a luscious plate of juicy roast beef be without a drizzle (or more) of a rich golden brown and of course, beefy gravy? Well, around here, we'd say that was a sacrilege! (or at the very least, b-o-r-i-n-g!)
So, this is where I share the hubber's tried, tested and true method for making a perfect gravy with you. It's basically the same process whether you're planning to drizzle (or pour) it over beef, chicken, pork, turkey or basically just about any other roasted or pan-seared protein you can think of.

1. While the roast is resting, it's time to make the gravy! I love the veggies that are left over in the roasting pan, but they're usually not the prettiest thing to look at. They get a bit mushy, but the caramelization on them is gorgeous and adds the most lovely depth and richness. Oh dear. I digress yet again...
2. After removing the meat and the veggies, you'll see a lovely brown stickiness left on the bottom of the pan. This is called the fond (primarily in fancy French culinary circles). But, we can just call it "pan drippings" if you prefer. This lovely little gift that your roast leaves behind serves the very important purpose of being a rich (and in this case beefy) base for an exceptional gravy.

Cook's Note: Most grocery chains in America now carry both broth and stock and each of these serve their purpose. But, in our humble opinion, using stock whenever possible for making a meat gravy is always the better option. Don't get me wrong... broth will still make a delicious gravy, sauce or soup, but because it's made by slowly simmering the roasted bones along with any remaining meat that is left on those bones, a stock has a certain depth of flavor that you just can't get from a broth.

3. Place your roasting pan on a burner (or burners) set at medium to medium-high heat.
Cook's Note: Now... if you've used a glass or thinner ceramic baking dish, I would suggest using some kind of diffuser with a gas cooktop or with one that has electric coil elements, in order to protect it from cracking or shattering from the direct heat. If you don't happen to have a diffuser lying around, alas, do not despair...

You can just use the heat that's left over in the pan from the roasting process. This will allow you to bring the drippings to the point where they can be poured into a heat-safe pot. While the pan is still hot, pour a small amount of liquid (stock/broth, wine, water, etc.) into it and stir it quickly with a whisk or spatula, just long enough to loosen the fond from the bottom. As soon as you've achieved this, carefully pour the contents into a nice heavy saucepan, making sure to scrape up every last bit of that goodness you've just freed from the bottom. Et voila! You are now ready to commence with the gravy making!

4. Pour about a quarter cup of stock/broth into the pan and using a whisk or a heat-safe spatula begin stirring and gently scraping the bottom of the pan as the stock comes up to a steady and robust simmer.

5. Add in your wine (or vermouth) and continue to stir as it simmers. You'll notice that the liquid in the pan will begin to thicken. This is exactly what you want to happen.

6. Put your flour in a large glass, plastic bottle or jar that has a tight-fitting lid.

7. Add in the water and give it a bit of a stir with a long fork or a skinny whisk to loosen the flour from the bottom. Place the lid on the container and make sure it's on there tightly. Now, shake the dickens out of it, until you can no longer see any lumps or pockets of dry flour. (we recommend doing this over the sink, just in case the lid gets loose and the slurry goes flying all over the kitchen - trust us - we know about this from personal experience!)

Cook's Tip: A proper slurry should be roughly the consistency of a "heavy" or "whipping" cream. (I think that'd be known as "double cream" to our European friends!)

7b. While this next step is optional, I would highly recommend doing it. We like to add a good tablespoon or two of butter to the pan at this point and stir it in until it has melted completely. It's just one more little flavor booster that you might not realize is in there, but your taste buds will definitely recognize it!
8. Now you can slowly pour the slurry into the briskly simmering base, whisking vigorously as you go.

Cook's Tip: Please keep in mind that you might not need all of the slurry that you've mixed up, so please be patient and resist any temptation to pour every last drop into the pan at once.

9. When the contents of the pan reach the thickness of a standard pancake batter or a pudding or custard that hasn't reached its full setting point, it's time to add the rest of the stock/broth to the pan.

10. Continue slowly adding more stock/broth to the pan while whisking, until it reaches the thickness that you prefer. Some people like a very thick gravy and others might like it more on the thin side. This is truly one of those areas of cooking that come down to personal preference, so adding the stock/broth slowly will help you to reach your desired gravy consistency.

11. Season the gravy well with salt and pepper. And if you happen to be the adventurous type, you can experiment with some additional herbs and/or spices. Maybe just a pinch of onion or garlic powder, a little bit of chopped rosemary or possibly some freshly chopped thyme. The only limit is your imagination!

12. Finally, at this point you should have your sides all prepared and ready to go, so go ahead and have at it - and I sincerely hope that you enjoy every last bite!
I'll be posting the recipes for the side dishes we had with this roast very soon and I'll be sure to link them here at the bottom of this post when they're up on the blog. But...
If you want to be sure not to miss those posts (or any of my future recipes), why not pop over to the sidebar on the right, or just below this recipe and subscribe!


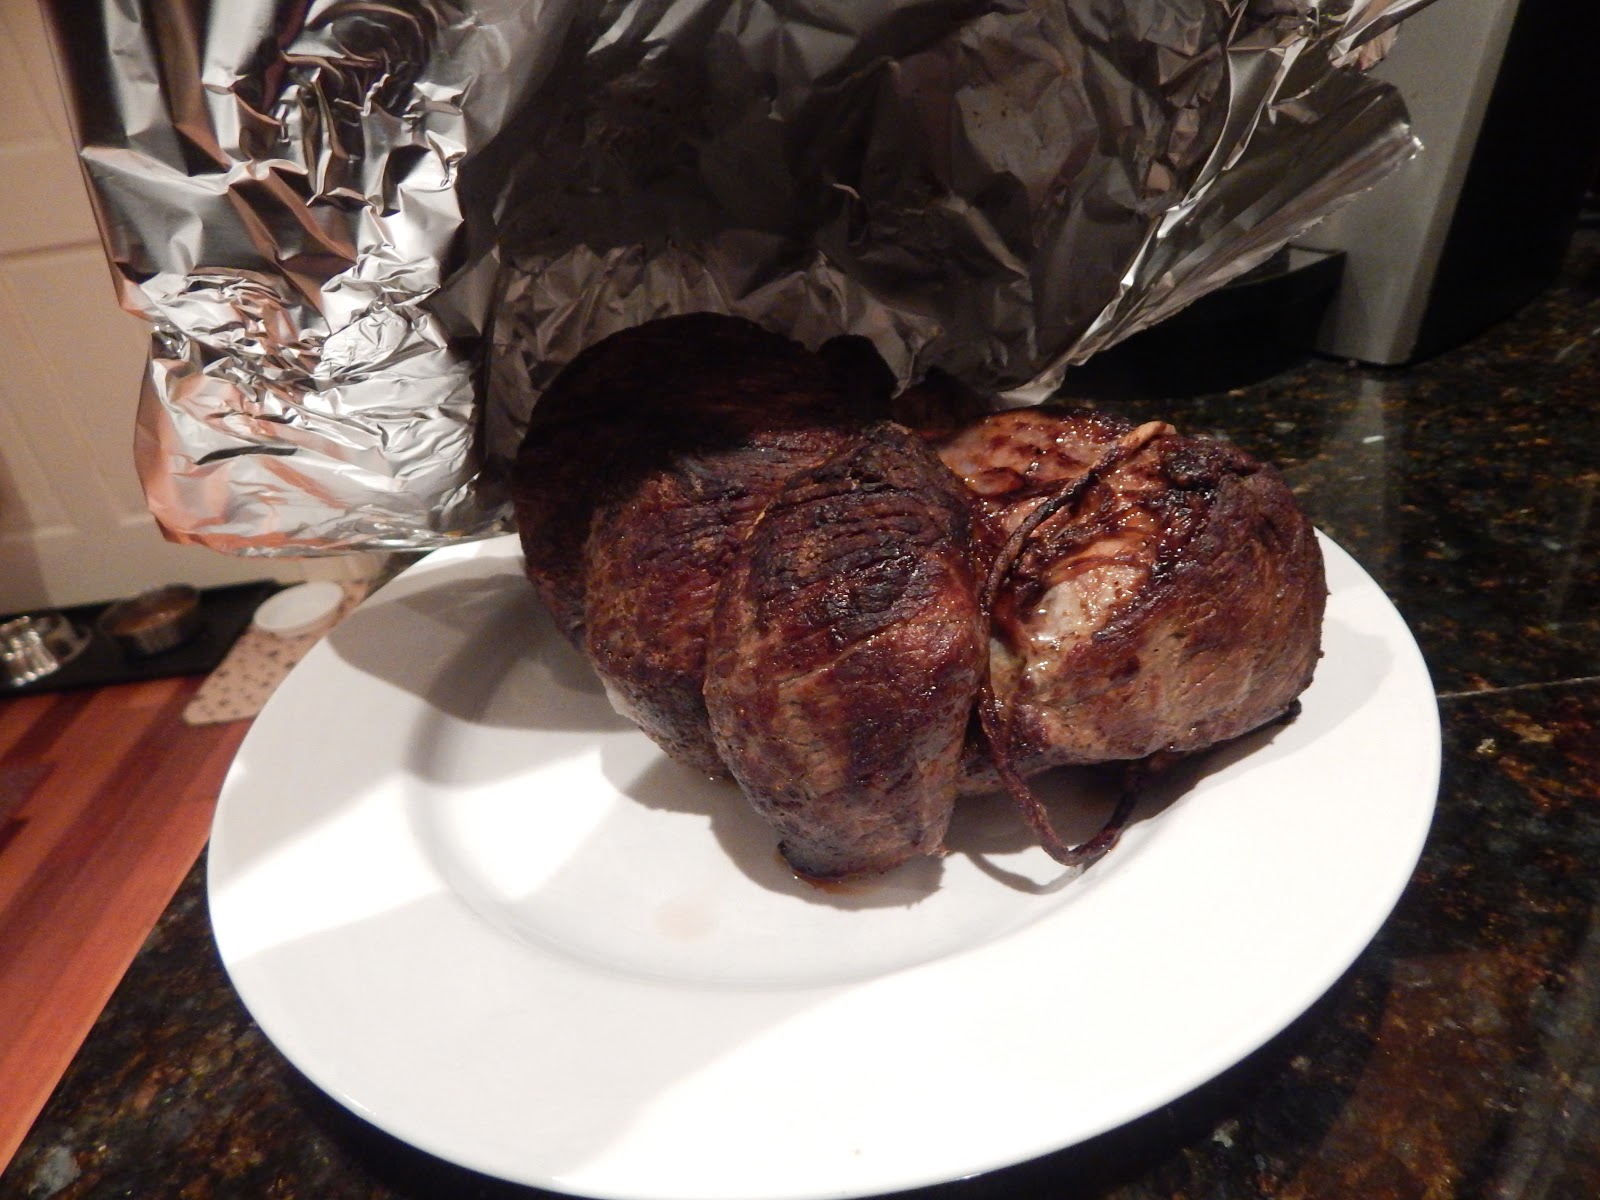
This roast ended up being just a tad over-cooked for our tastes. I was busy making the potatoes and mushrooms and I left it in the oven a little longer than I normally would. We prefer a roast beef like this to be more on the medium rare side and this was a bit more in the medium range. The internal temperature was already about 128°F and (as you can see in the charts above) I really should have taken it out when it had reached 120°F. It was still quite delicious, though! And it was even better the following night when we had hot roast beef sandwiches for dinner!
Mary
Don't Forget To Follow Me On Social Media! I Post Blog Updates, Ideas For Kitchen "How To's", Restaurant Recommendations And Reviews And Always Lots Of Photos!
Don't forget that you can print this (or any) recipe using the "Print Friendly" button at the foot of each post. It's a great little feature that allows you to remove any pictures (or any text that isn't relevant to the recipe) before printing. That can save on ink and paper & in today's economy, who doesn't want to save a little cash when you can?!


